
Creating a Waiver Template
Creating waiver templates in Waiverly is quick and simple. Follow these steps:
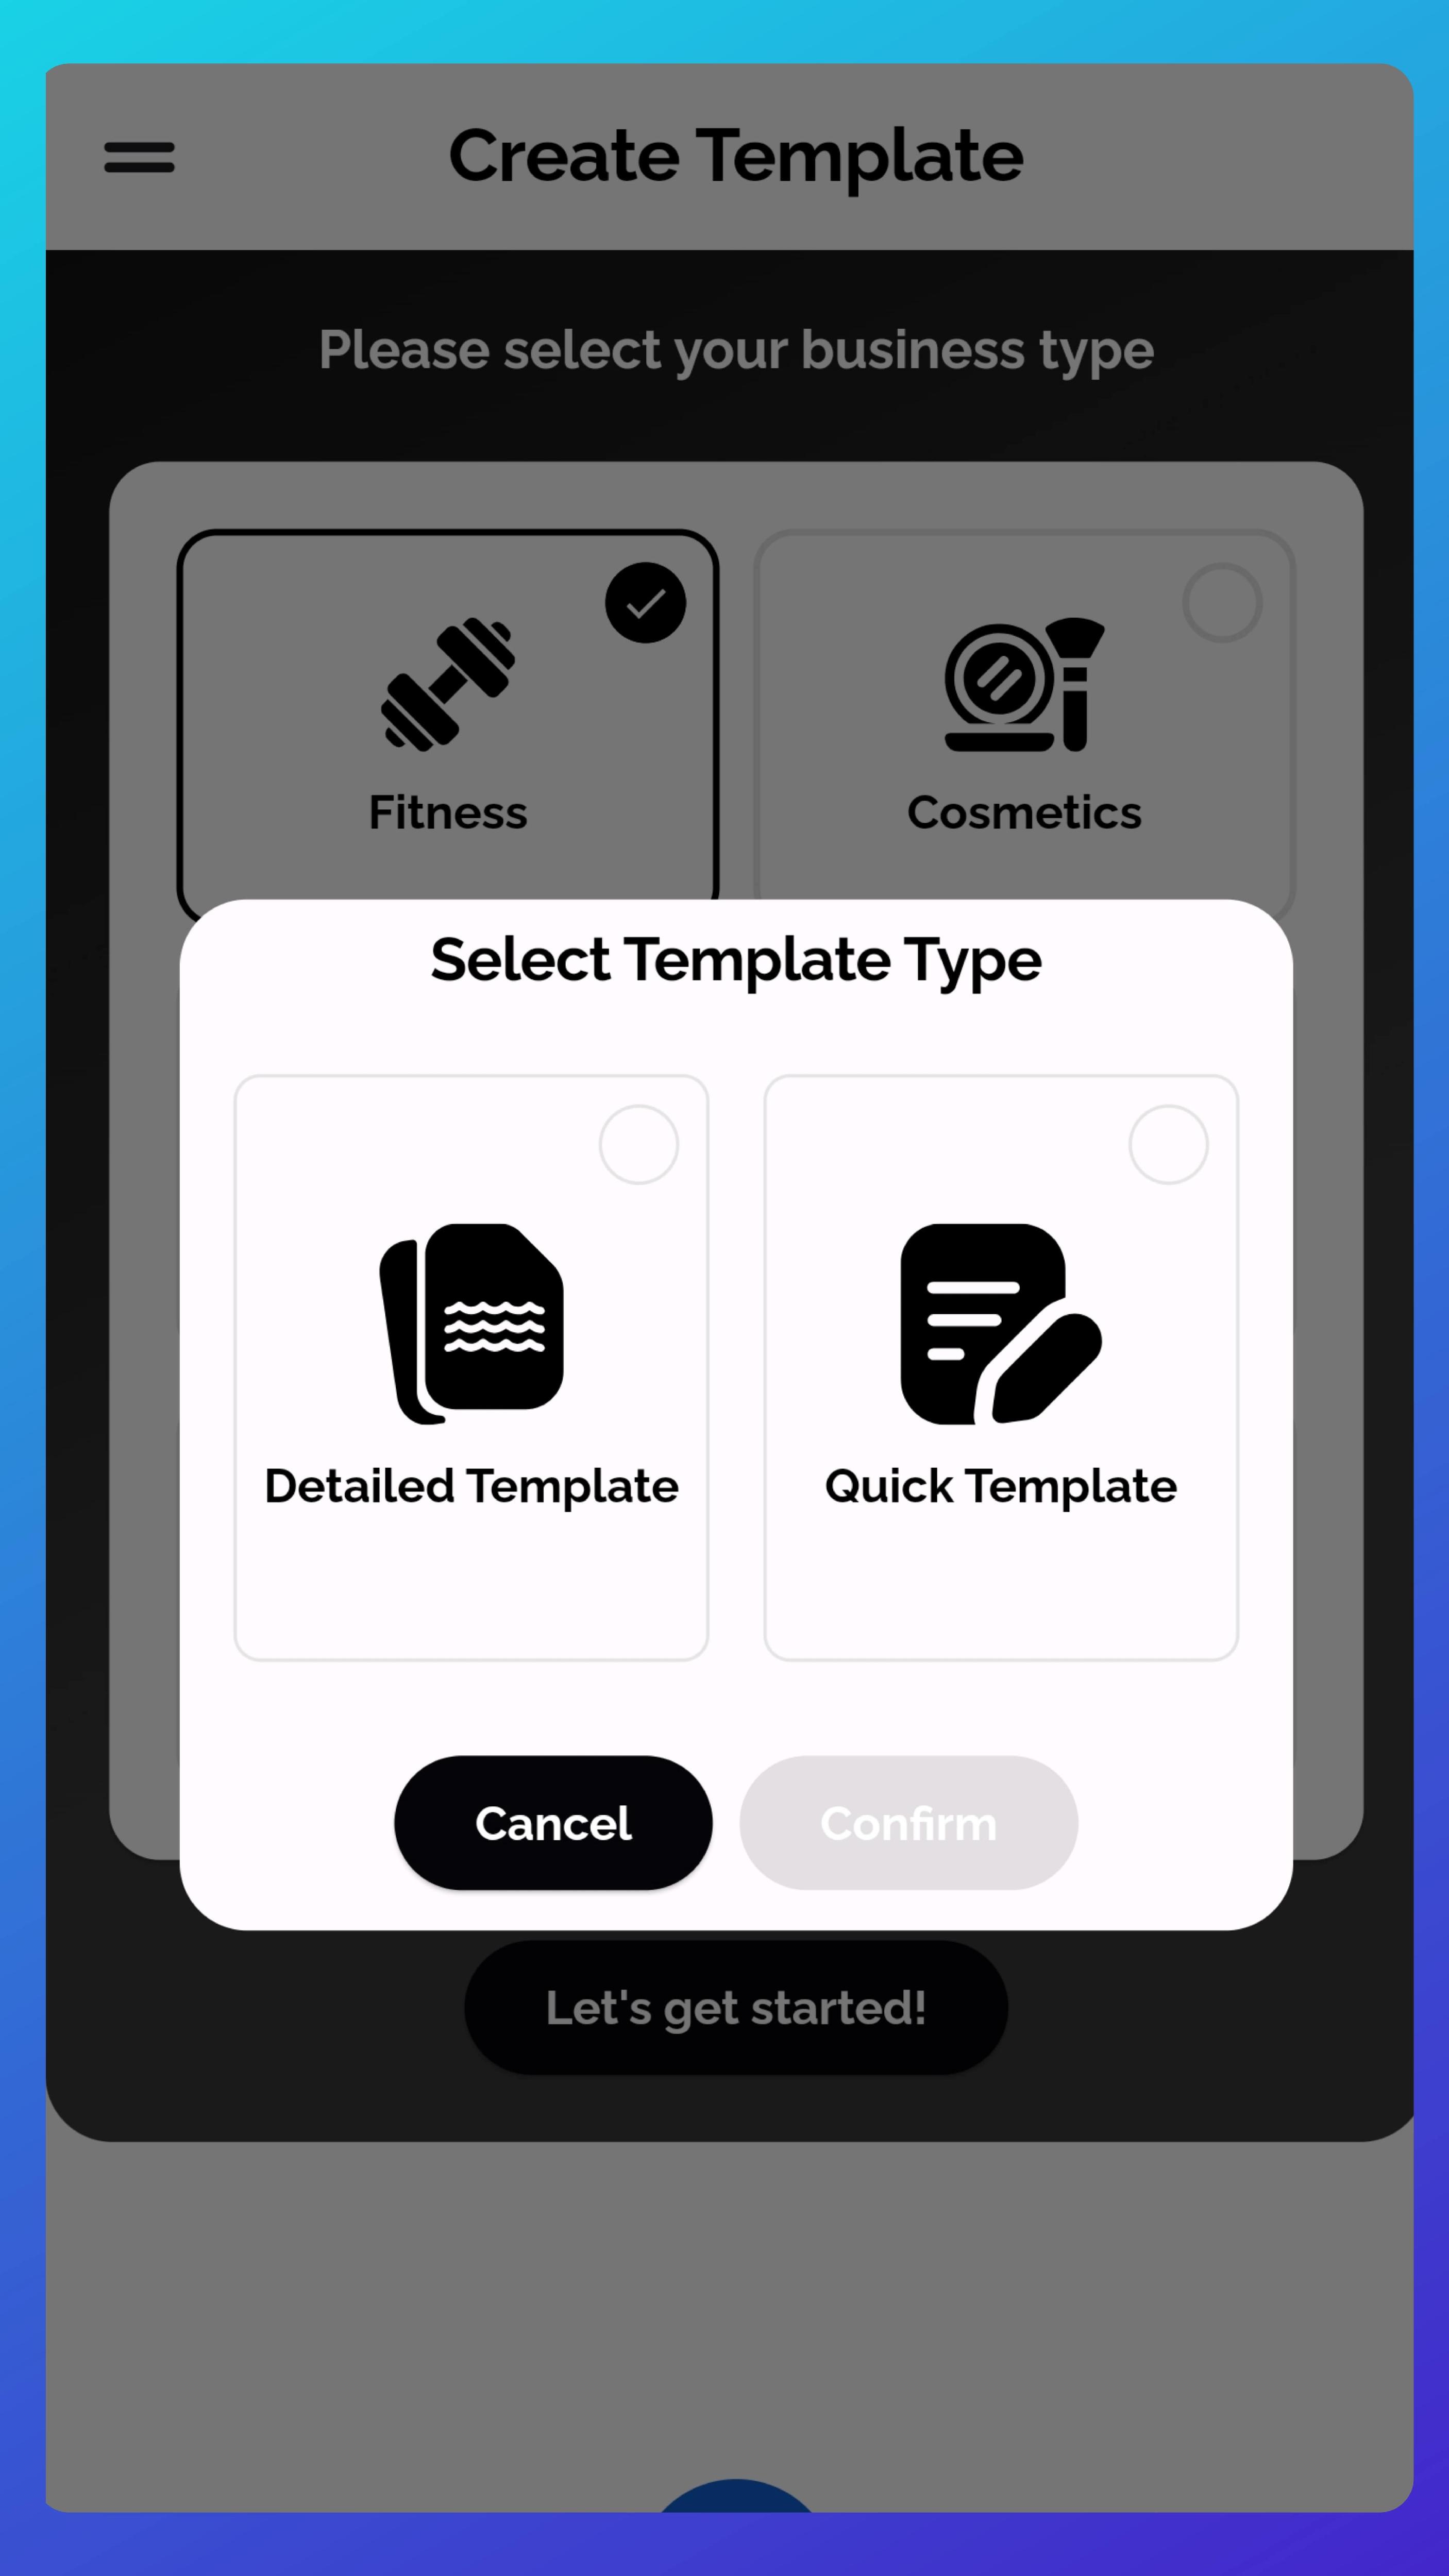
Step 1: Select Template Type
-
Go to the "Create Template" screen.
Select your industry.
Choose between two template formats:
- Detailed Template: Ideal for first-time users, this option guides you through common waiver sections tailored to your industry.
- Quick Template: Perfect if you're familiar with creating waivers, allowing you to quickly set up custom sections.
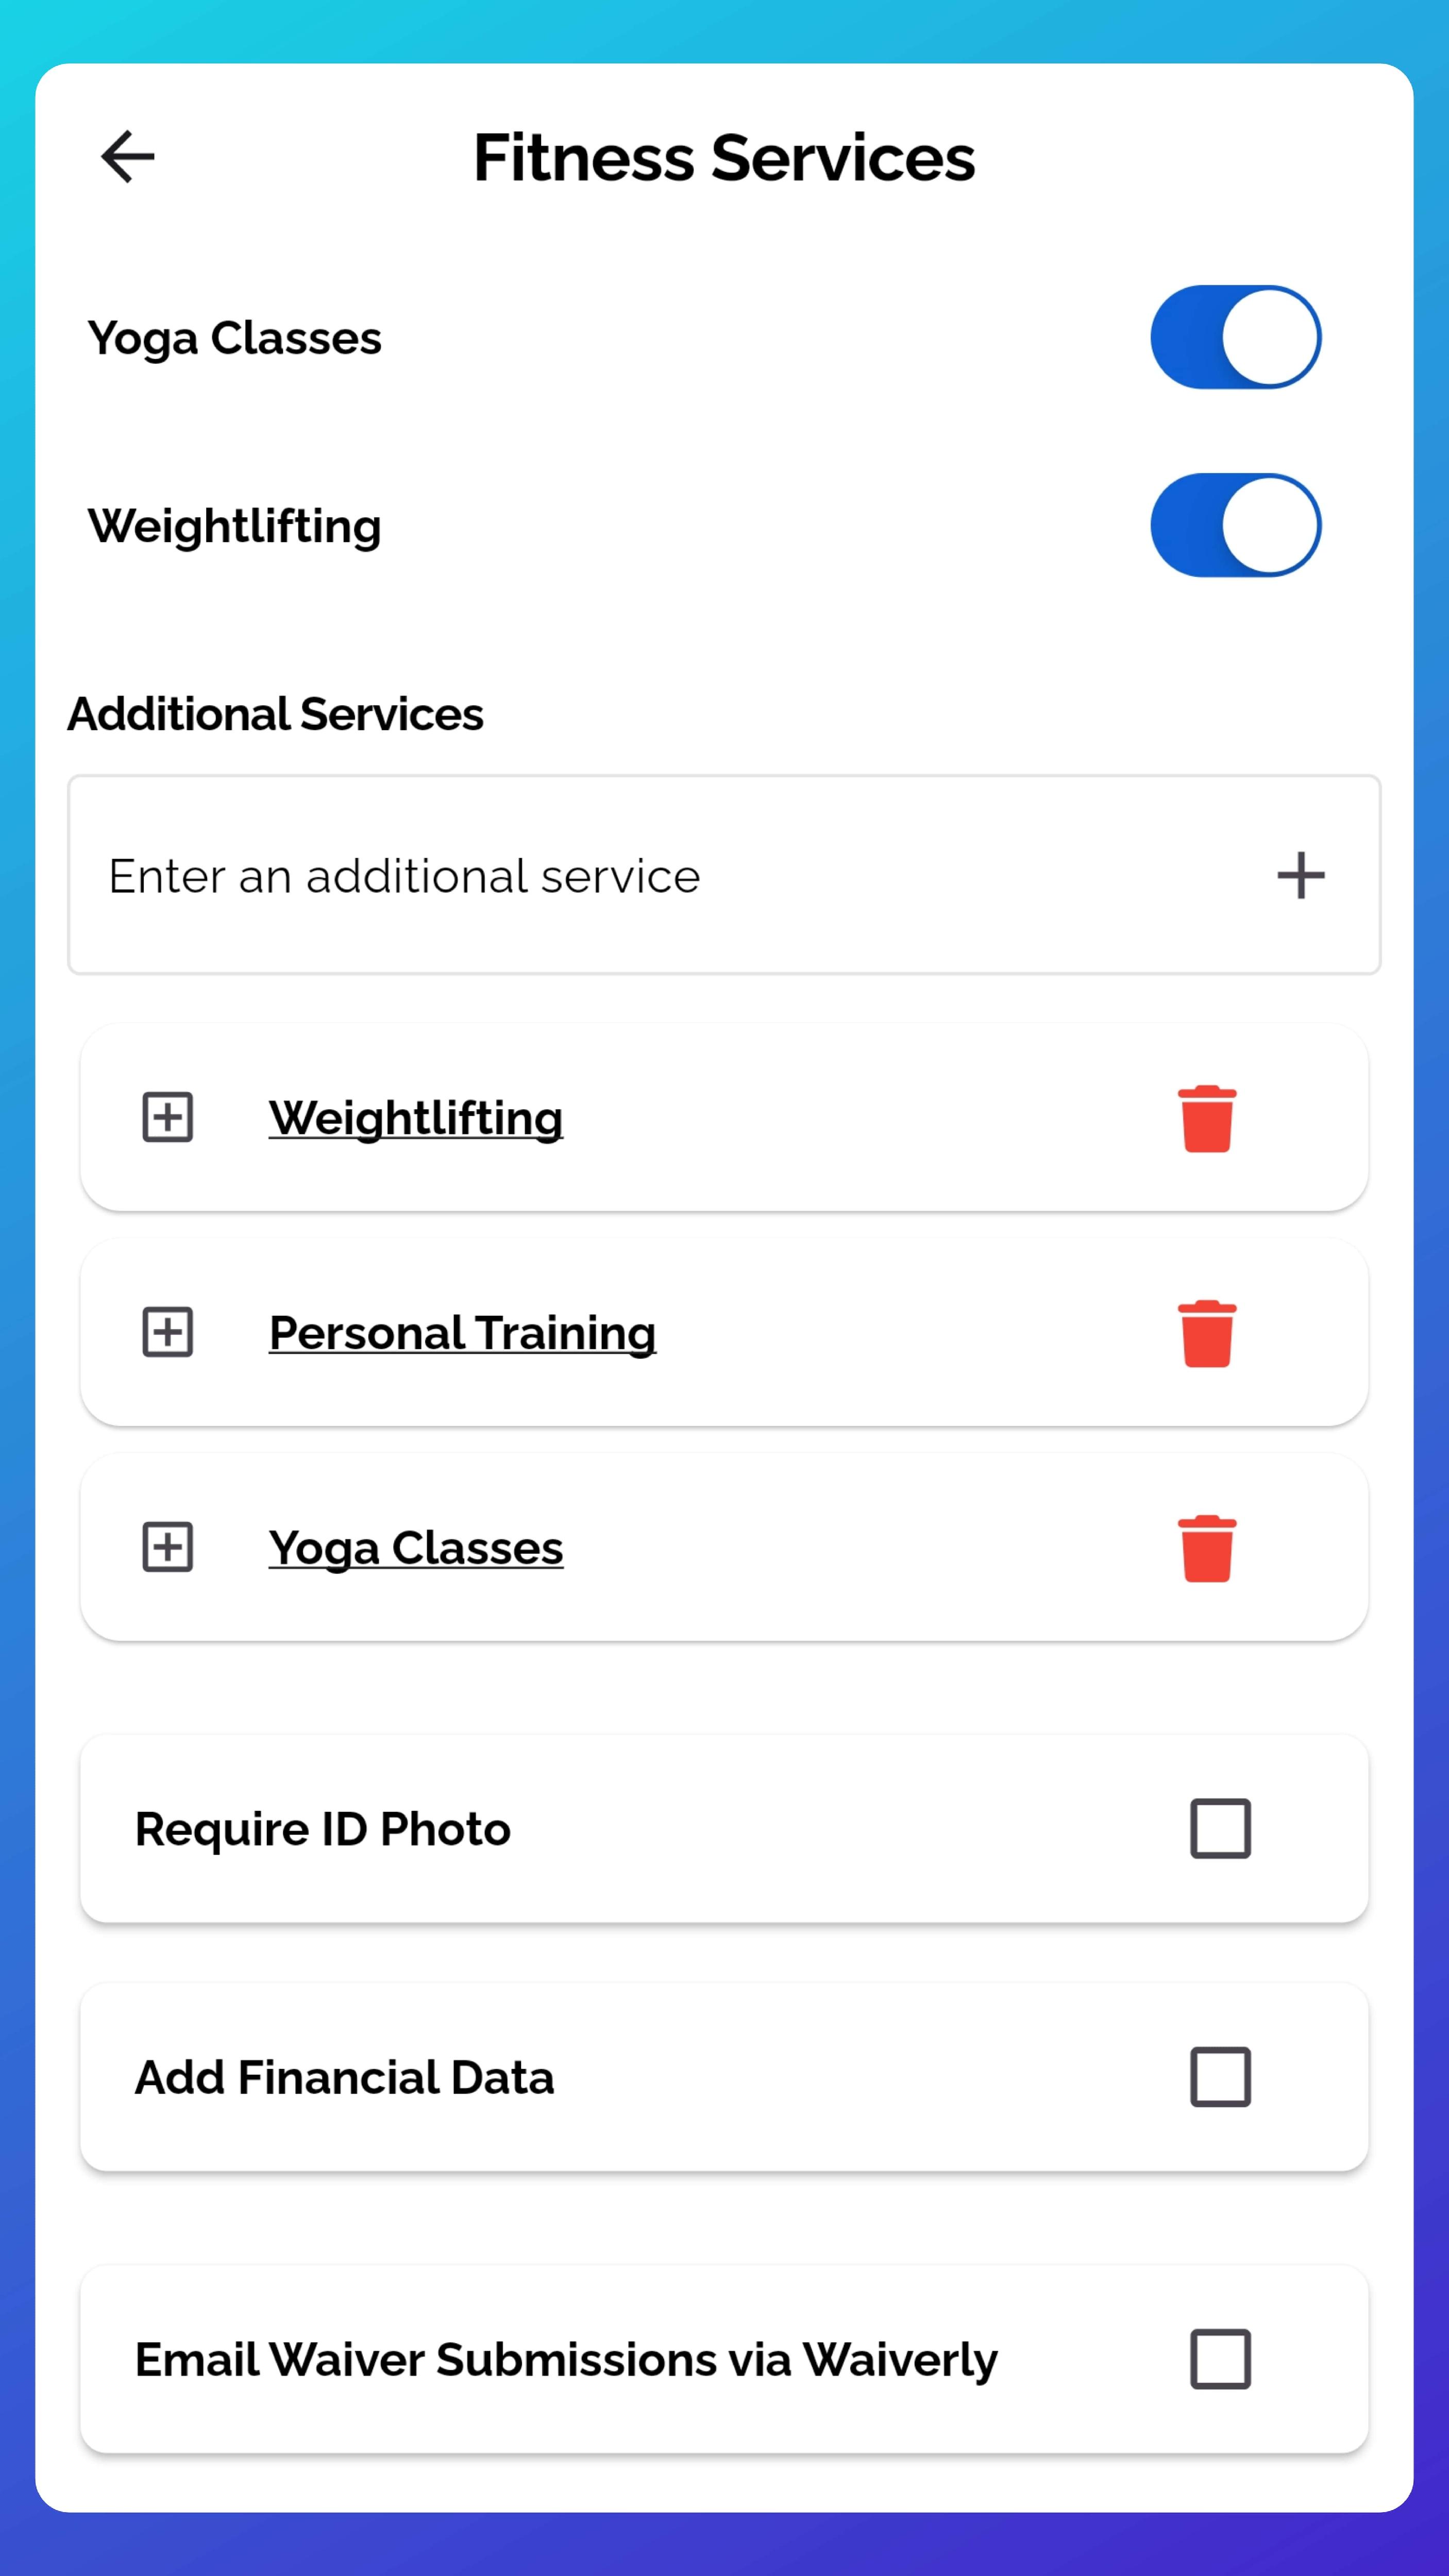
Step 2: Template Details and Settings
Once you've selected your template type:
-
Provide a Template Name.
Specify the services your business offers.
Choose any of the following additional requirements for your waiver:
- Require ID Photo: Adds a step for clients to upload a photo of their ID when signing.
- Add Financial Data: Enables administrators to input financial details during the waiver signing process (recommended for on-site waiver signing).
- Email Waiver Submissions via Waiverly: Automatically sends clients a copy of their signed waiver by email after submission. Emails are sent using Waiverly’s email processor, with your business email as the reply-to address (set in your business account details).
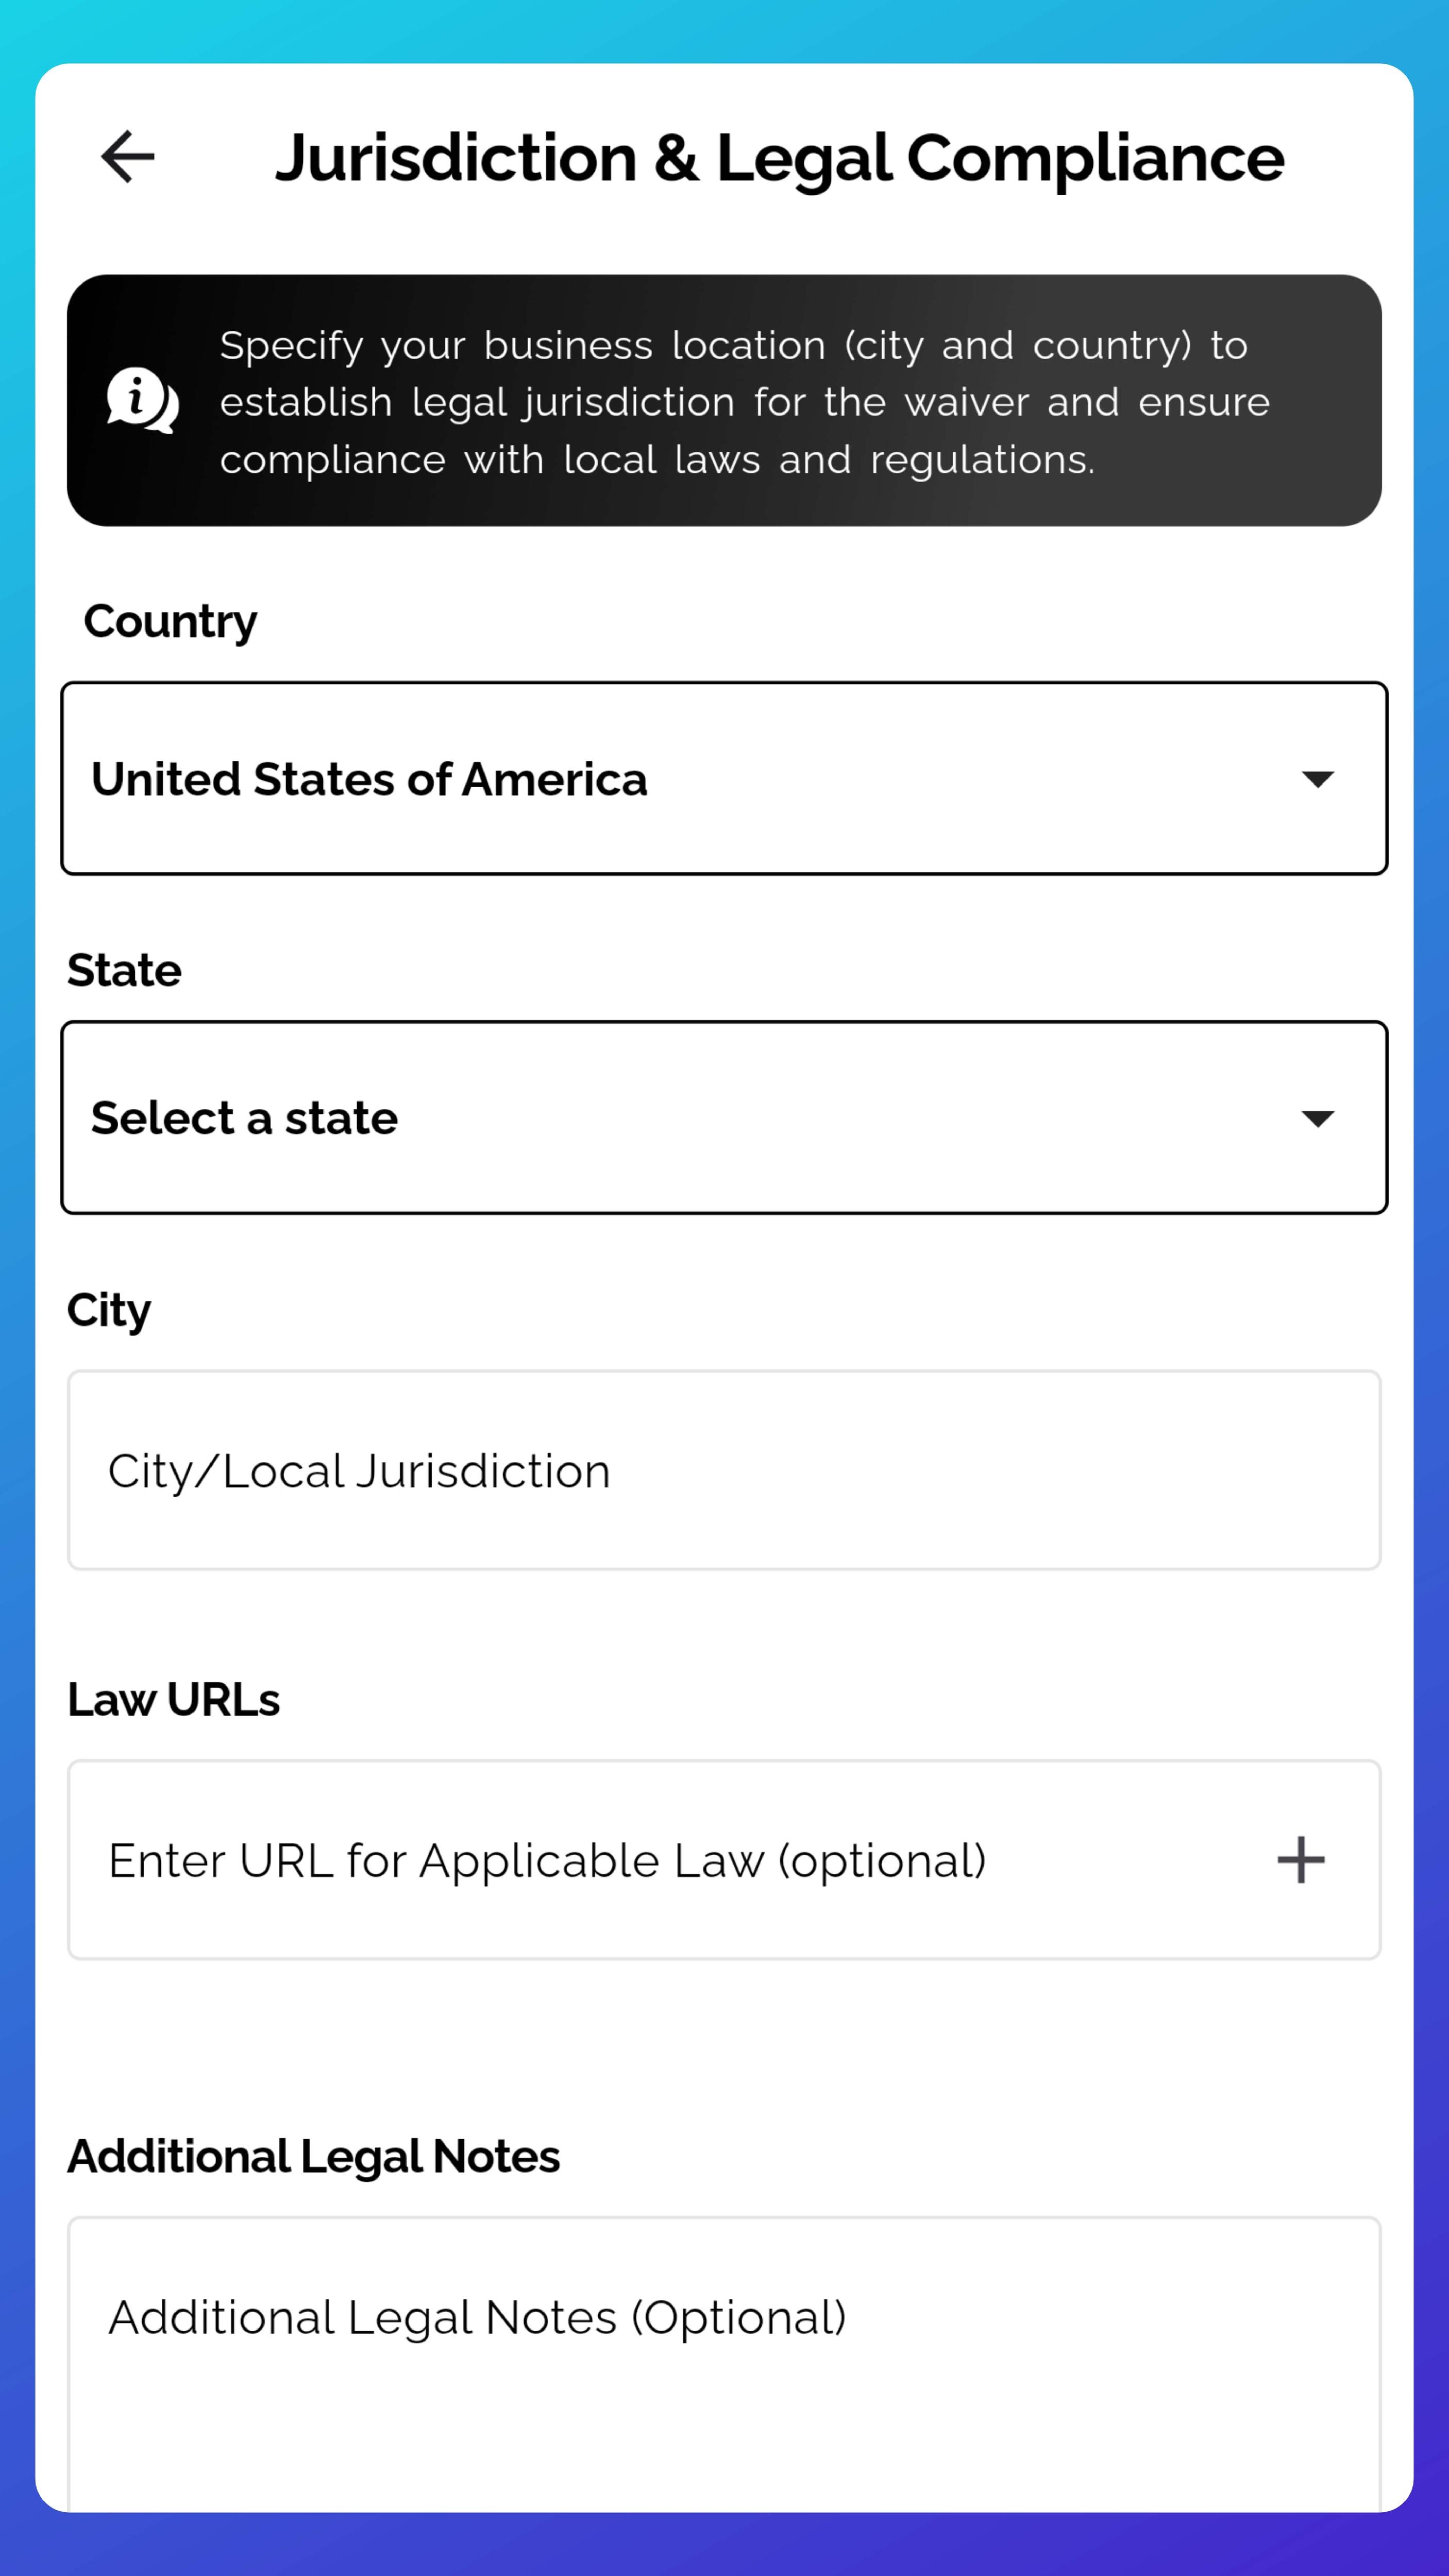
Step 3: Location and Additional Information
In the final setup screen:
- Select the location where the waiver applies.
- Enter any additional information you'd like included.
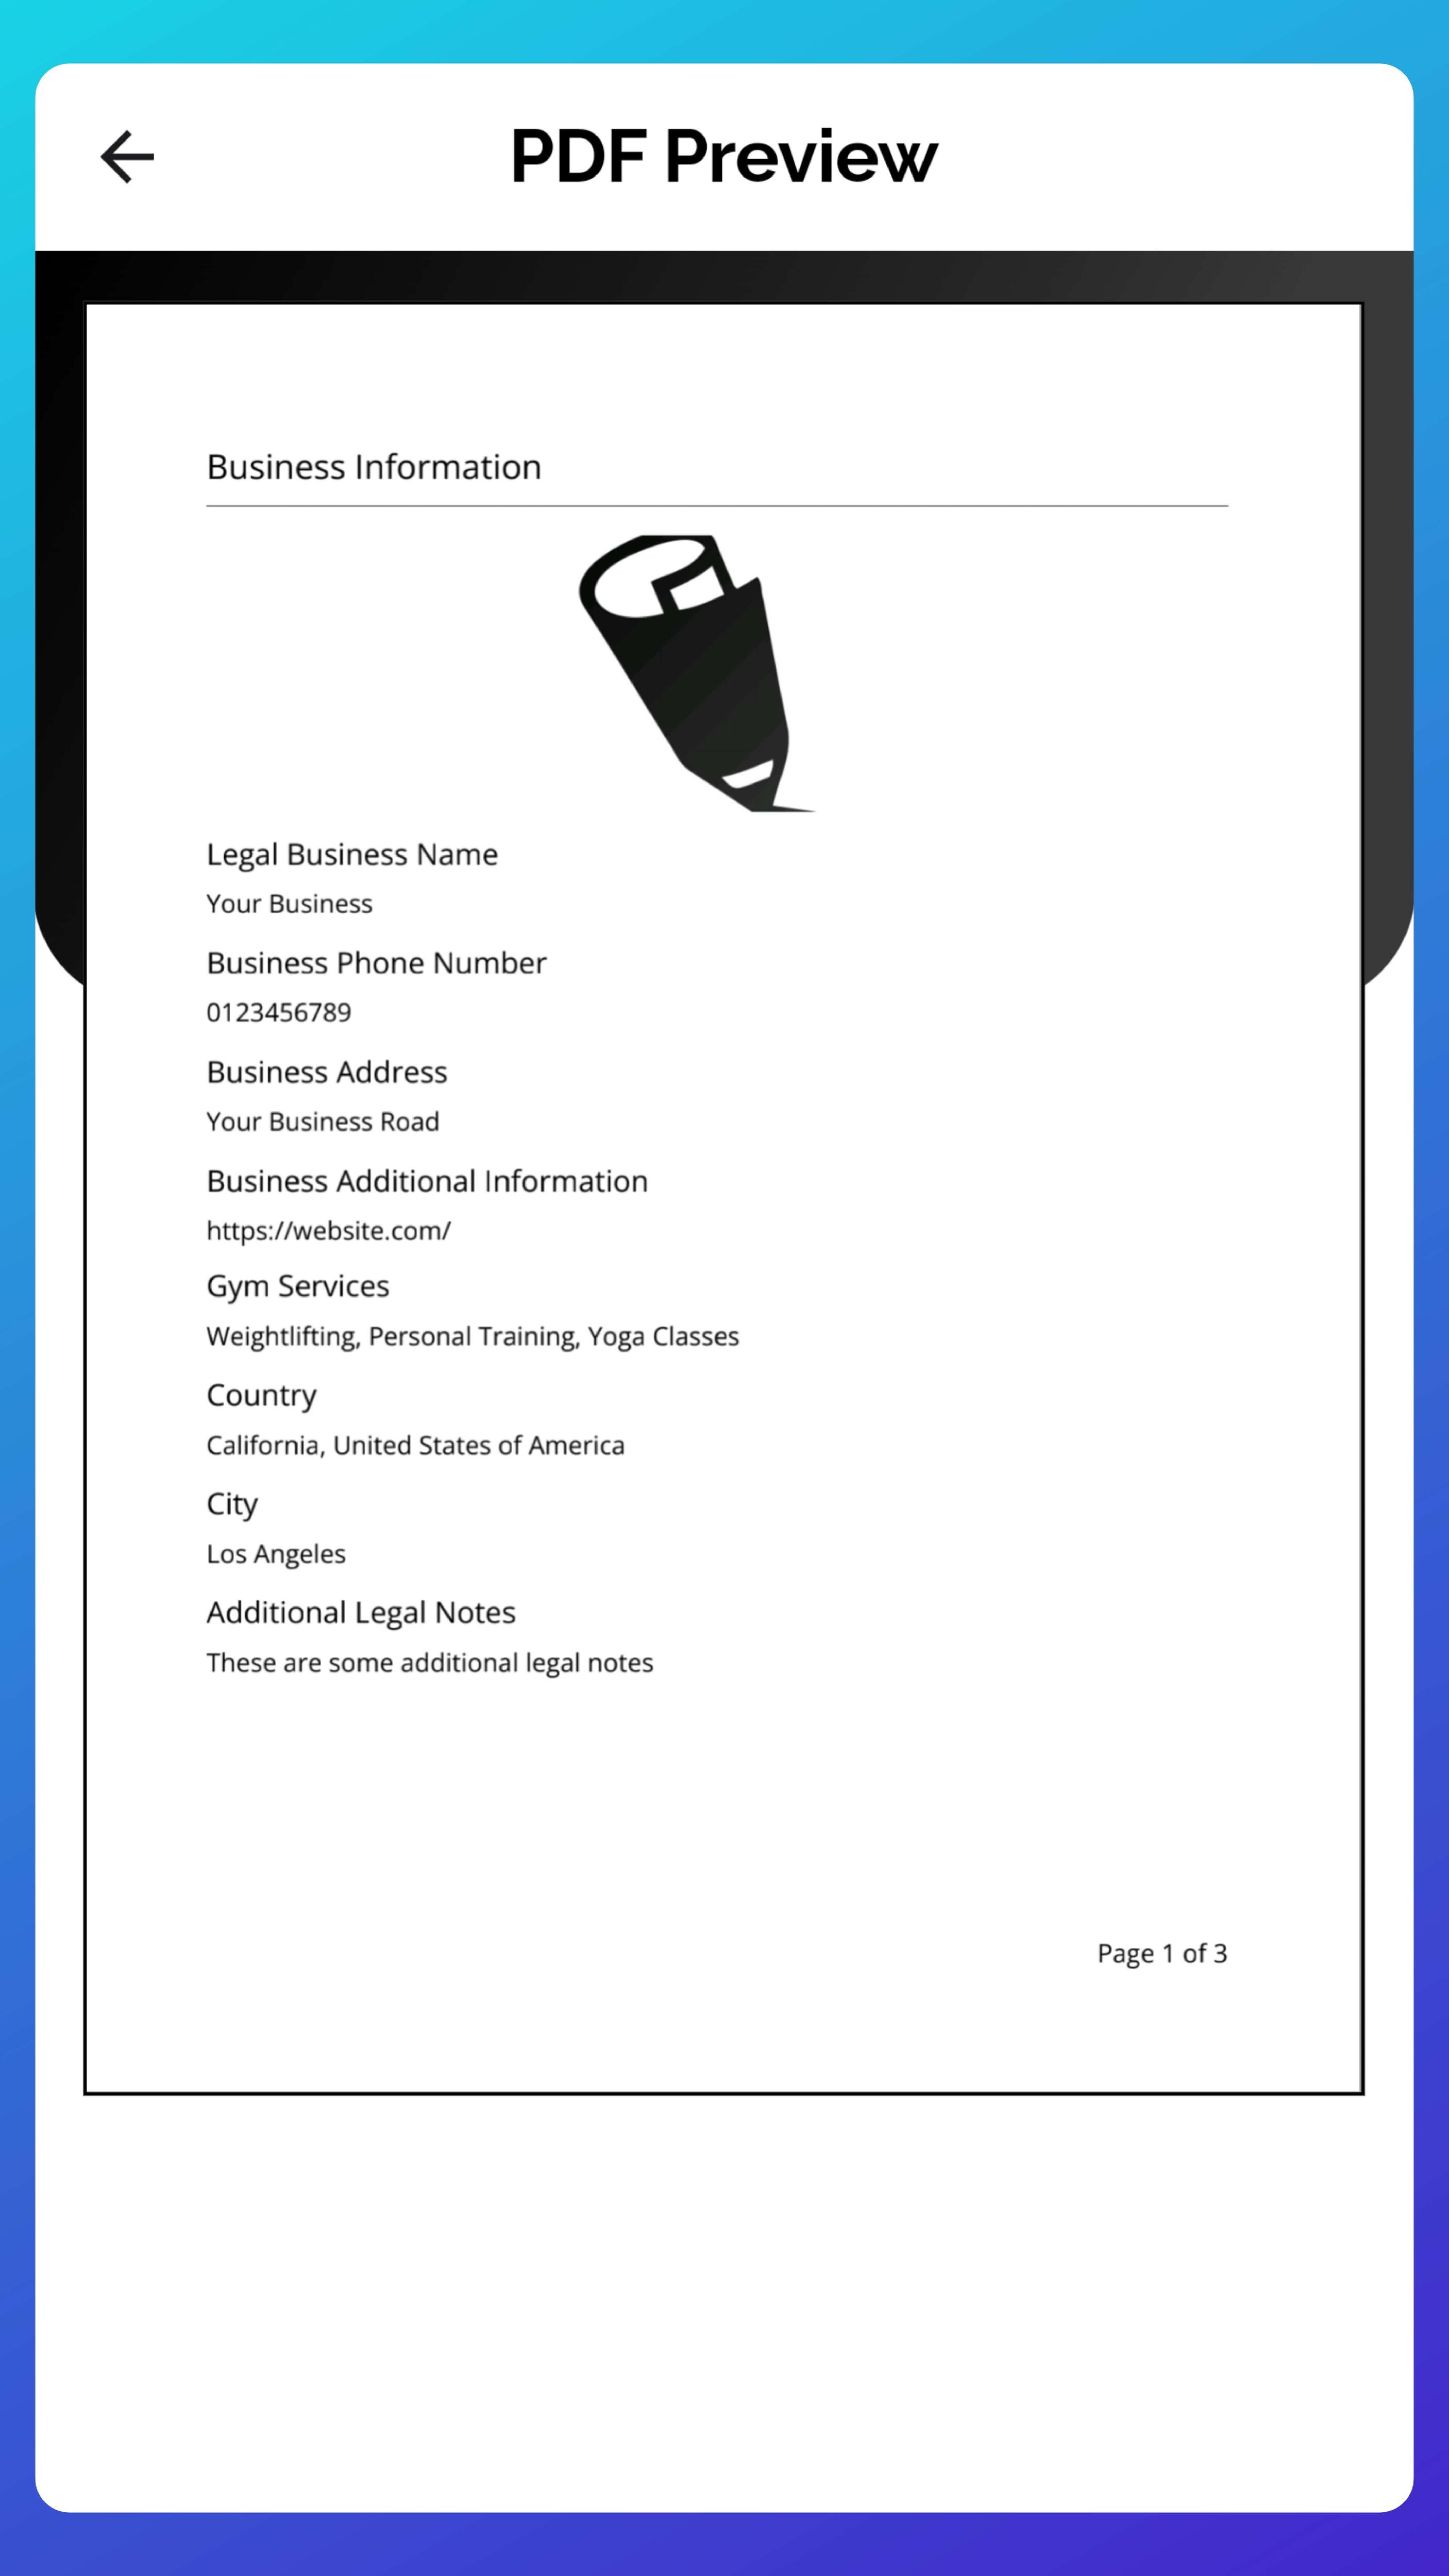
Step 4: Review and Save
- You'll see a PDF preview of your waiver template. Review it to ensure everything is correct.
- Click "Save & Finish" to store the template in your account.
Viewing Saved Templates
All saved waiver templates are accessible from the "Waiver Forms" screen, where you can view, edit, and manage your templates.